
Punch list management is the process of documenting, assigning, and verifying every remaining defect or incomplete task before a project reaches final closeout. Success has one measurable definition: every item closed, every closure verified, retainage released, and the Certificate of Substantial Completion signed without a second dispute. Everything below, from templates to workflow to dispute triage, exists to get you to that point faster.
TL;DR:
- Running a pre-walk inspection can reduce punch list items by a third or more by catching obvious issues early.
- Assigning a dedicated verifier separate from the repair crew ensures better quality control and timely closure of punch items.
- For projects over 100 open items or involving multiple trades, adopting punch list software significantly decreases walkthrough time.
- Disputed items should be documented and handled through change orders to avoid scope creep and protect retainage claims.
- Effective punch list management relies on specific, photo-supported descriptions, filtered trade assignments, and a structured workflow to prevent delays.
Table of Contents
- What Is a Punch List, and Why Does It Control Your Cash Flow?
- When Should You Run the Punch Walk?
- How Do You Run an Effective Punch Walkthrough?
- What Fields Belong on a Punch List Template?
- How Do You Manage the Workflow to Actual Closure?
- Should You Upgrade From Spreadsheets to Punch List Software?
- How Do You Handle Disputes and Suspected Change Orders?
- How Fast Should Punch Lists Close, and What Does Delay Cost You?
- What Best Practices Actually Shorten Closeout?
- How Do Trade Businesses Turn This Into a Repeatable System?
- What’s the One Rule Worth Enforcing on Every Walkthrough?
- How Rebuildingthetrades Helps Firms Fix Punch List Delays
- Sources
What Is a Punch List, and Why Does It Control Your Cash Flow?
A punch list is the formal record of incomplete or deficient work identified during a final walkthrough, and it’s usually required before a contractor gets final payment and the Certificate of Substantial Completion. The term traces back to literally punching holes next to completed items on a paper checklist. Today the mechanics are digital, but the stakes are the same: this list is a financial control point, not a courtesy to the owner.
Substantial completion is the trigger. Once a building is functional enough for its intended use, the owner (often through the architect or a general contractor’s project lead) walks the site and logs what’s missing or broken. That list becomes the gate between you and the money still sitting in retainage.
A few things stay true regardless of project size:
- The owner, architect, or GC typically initiates the list; subcontractors execute the fixes.
- Whoever controls “verified” status controls the payment timeline, so assign that role deliberately, not by default.
- An unclear item description is the single biggest reason punch items sit open for weeks.
When Should You Run the Punch Walk?
Timing determines how many items you’re dealing with at the end. A rolling punch list, meaning continuous verification of work as each phase wraps, prevents the pileup that turns a final walkthrough into a three-day event. A single final walkthrough, by contrast, catches everything at once, which sounds efficient until you’re staring at 200 line items with two weeks left on the schedule.
Industry practice leans toward rolling lists for exactly this reason: continuous checks catch problems while the crew that caused them is still on site, which is a commonly recommended approach for keeping backlog manageable.
Baseline timing to plan around:
- Residential projects: schedule the formal punch walk 7 to 14 days before target closing.
- Commercial projects: plan for 14 to 30 days, scaled to square footage and trade count.
- Run an internal pre-walk before the owner or architect ever sees the site. It routinely cuts the final list by a third or more, because your own team catches the obvious stuff first.
How Do You Run an Effective Punch Walkthrough?
The walkthrough itself is where sloppy documentation gets born or avoided. Bring the right people, carry the right tools, and move through the building in a sequence that doesn’t require backtracking.
Who should be in the room:
- The owner’s representative, who has final say on acceptance.
- The architect or designer, especially on commercial work where design intent matters for judgment calls.
- Your project lead, who owns the list afterward and answers for every item.
What to carry:
- A mobile device with a working camera (a tablet is easier for on-site note taking than a phone).
- The current plan set, printed or on-screen, for pinning items to exact locations.
- A flashlight, since attics, crawl spaces, and mechanical rooms hide half the real problems.
- A punch list template, digital or paper, with fields already built for this project.
- Marking tape or chalk for anything that needs a physical flag for the trade crew.
Room-by-room flow that actually works: start at the entry point and move systematically, never randomly. Test every switch and outlet. Run every faucet hot and cold. Open and close every door and window to check alignment and hardware. Check HVAC registers for airflow and thermostat response. Finish with the exterior: grading, caulking, paint lines, and fixture attachment.
Photograph every defect before you write the description, and capture location and timestamp metadata with each shot. Pin the photo to the exact spot on the digital plan set if your tool supports it. Name files consistently (unit number, room, item number) so a subcontractor who wasn’t on the walk can still find the problem without a phone call.

Pro Tip: Walk with the plan set open on a tablet and pin each item the moment you find it. Waiting until end-of-day to log items from memory is how “outlet in kitchen” turns into a three-text conversation about which kitchen and which outlet.
What Fields Belong on a Punch List Template?
A punch list template lives or dies on specificity. If a trade who wasn’t present can’t locate and understand an item from the description alone, the field is doing its job wrong.
Project header fields:
- Project name and site address
- Contract number
- Walkthrough date and type (internal pre-walk, owner walk, or final)
Per-item fields, and a well-built item template needs these at minimum:
- Item number for tracking and cross-referencing
- Location (building, floor, unit, room)
- Description, written to be concise and measurable, not vague
- Photos, attached directly to the item
- Responsible party (the specific trade or sub)
- Priority (safety issue, code violation, cosmetic)
- Due date
- Status (open, in progress, completed, verified)
- Verifier (the name of whoever signs off on completion)
Here’s the difference between a bad item and a usable one:
Bad: “Fix bathroom door.”
Good: “Unit 204, master bath: door binds on strike side, gap under 1/8 inch, needs rehang or plane. Assigned to ABC Framing. Due March 18. Priority: medium.”
The second version tells a sub exactly where to go, what’s wrong, and what “fixed” looks like without a follow-up question.
How Do You Manage the Workflow to Actual Closure?
A template is just a spreadsheet until you build a process around it that forces items to close. That process has four moving parts: grouping, sequencing, verification, and reporting.
Group items by trade before you send anything out. A 150-item master list dumped on every sub is a guarantee that half of it gets ignored. Filtering the list so each subcontractor only sees their own items improves response rate because nobody’s digging through 40 irrelevant line items to find the five that are theirs.
Schedule the work in waves, not all at once. A staged sequence, mechanical and electrical trades first, then carpenters and finishers, then paint, then final clean and verification, reduces rework because later trades aren’t undoing earlier fixes. Rough timing looks like:
- Early days: mechanical, electrical, plumbing fixes
- Middle days: carpentry and finish work
- Later days: paint and touch-up
- Final day: cleaning crew, then verification walk
Run two-step verification on every single item. The crew marks a task complete, but that’s not the same as done. A designated verifier, someone other than the person who did the work, confirms it separately before status changes to “verified.” Skipping this step is how items get reopened twice and trust with the owner erodes.
Keep a reporting cadence that doesn’t rely on memory. Daily check-ins with the project lead, automated reminders to subs sitting on overdue items, and a weekly progress report to the owner or GC keep everyone honest about where the list actually stands, not where someone thinks it stands.
Pro Tip: Never let the same person who fixed the item be the one who marks it verified. It sounds like extra friction, but it’s the single fastest way to catch a “fixed” item that isn’t.
Should You Upgrade From Spreadsheets to Punch List Software?
For a small residential remodel with 20 items and one trade, a spreadsheet works fine. Past that, the math changes fast.
On larger projects, spreadsheets become unmanageable; modern platforms let teams capture items on mobile devices, pin them to digital drawings, attach photos with metadata automatically, and convert ambiguous items into RFIs when scope is unclear.
Rough capability tiers:
- Spreadsheets: fine for single-trade, low-item-count residential jobs where one person owns the whole list.
- Entry-level field apps: add photo capture, basic assignment, and status tracking, good for small commercial jobs with two or three trades.
- Enterprise platforms: add drawing pin, offline capture, automated reporting, and verifier controls across multiple sites and dozens of subs.
The features that actually move the needle are photo metadata, blueprint pinning, saved templates, assignment filters by trade, and built-in verifier sign-off. Platforms offering drawing pins, offline capture, and automated reports measurably cut walkthrough time compared with manual tracking.
The upgrade trigger isn’t a calendar date, it’s scale: once you’re running more than roughly 100 open items, working across multiple sites, or coordinating more than five subs on one list, a spreadsheet starts costing you more time than the software would.
How Do You Handle Disputes and Suspected Change Orders?
Punch walks surface two kinds of items: legitimate deficiencies and owner requests dressed up as deficiencies, so proper weryfikacja wykonawcy budowlanego is crucial to know what to check before contracting. Confusing the two costs you money on every project where it happens.
Triage every disputed item the same way:
- Check it against the contract and spec sheet before agreeing to anything verbally.
- Do a quick scope comparison: was this in the original drawings, or is it new?
- Photograph and timestamp the condition immediately, whether you agree it’s a defect or not.
If it’s outside scope, don’t argue on the spot and don’t quietly add it to the punch list either. Say something like: “That looks like it’s outside the original scope. Let’s document it and issue a change order rather than folding it into the punch list.” A structured change order process keeps this from becoming a margin leak disguised as a punch item.
Protect your retainage claim with photo evidence, timestamps, and written verifier notes on every disputed item, resolved or not. If it goes to arbitration months later, that documentation is the only thing that matters.
How Fast Should Punch Lists Close, and What Does Delay Cost You?
Completion windows differ by project type. Residential punch lists generally close within a couple of weeks of the final walk, while commercial projects often require a longer period depending on complexity.
The real cost isn’t the delay itself, it’s what the delay ties up. A poorly managed punch list can drag on for weeks or months, holding retainage hostage the entire time. Retainage on a commercial job is frequently a portion of the contract value, money already spent on labor and materials but not collected until every item verifies closed.
To protect that cash:
- Require signed lien waivers only after verified closure, not before.
- Get a verifier sign-off on every item before submitting for final payment.
- Set documented deadlines with each sub, and enforce them the same way you’d enforce a schedule milestone.
What Best Practices Actually Shorten Closeout?
A handful of habits separate teams that close punch lists in two weeks from teams still chasing signatures two months later.
- Write item descriptions that are measurable and specific, never vague shorthand only you understand.
- Attach a photo to every single item, no exceptions, even ones that seem obvious.
- Send each sub a filtered list of only their items, never the master list.
- Require photographic proof before anything gets marked verified, and enforce the two-person verification rule without exception.
- Avoid walking too early, before trades finish, or too late, after the owner’s patience runs out. Run an internal pre-walk first to catch the obvious stuff before it becomes a documented item at all.
Pro Tip: If your punch list keeps growing after the “final” walkthrough, the problem usually isn’t the punch process. It’s that trades weren’t actually done when you walked. Push the walk back a day rather than starting a list you know is incomplete.
How Do Trade Businesses Turn This Into a Repeatable System?
Individual discipline on one project is good. A repeatable system across every project is what actually protects margin at scale. That means mapping punch items into the same KPI structure you already use for dispatch and field operations, not treating closeout as a separate, ad hoc process.
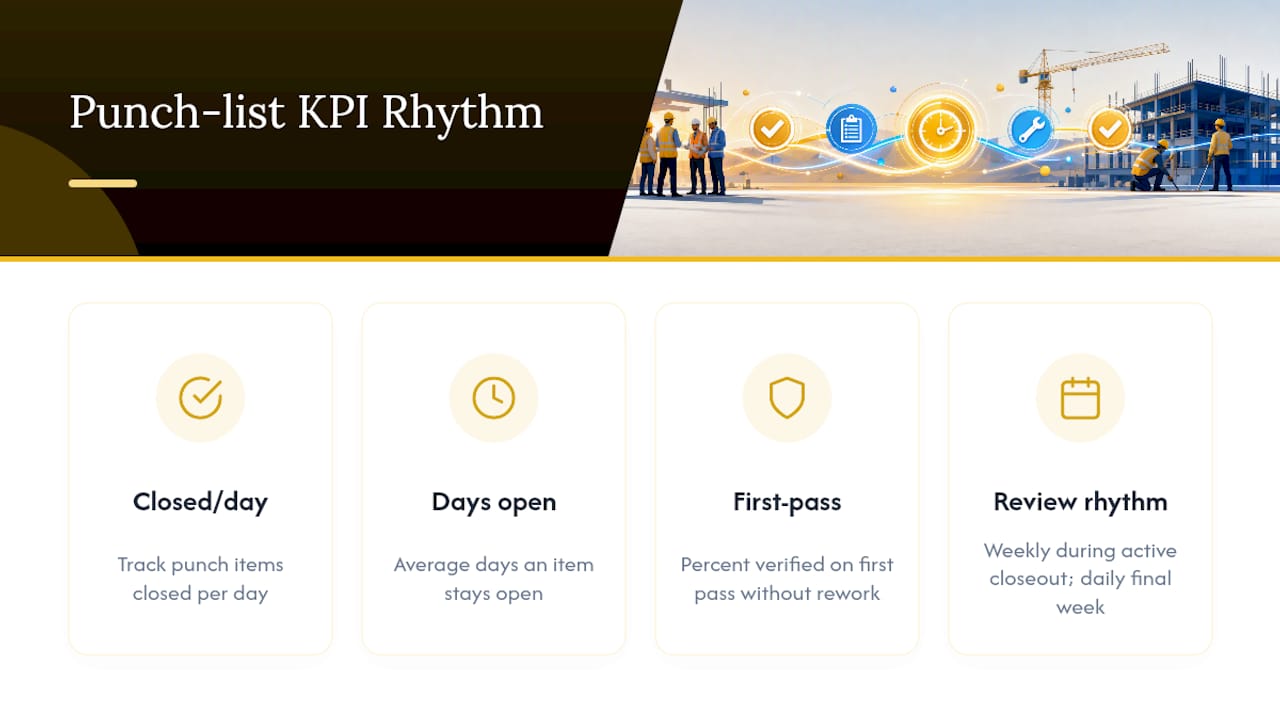
Three numbers worth tracking on every job: punch items closed per day, average days an item stays open, and percent of items verified on the first pass without rework. Trade firms running tight operations tend to review these weekly during active closeout and daily in the final week before handoff.
Rebuildingthetrades works with HVAC, plumbing, electrical, and remodeling firms to build exactly this kind of structure, tying punch-list execution into the same KPI tracking used for dispatch and technician performance. The documented process that governs verification and closure on a punch list should look identical to the one governing every other accountability point in the business, not a one-off workaround built for closeout week.
What’s the One Rule Worth Enforcing on Every Walkthrough?
The habit that saves the most time isn’t a tool or a template, it’s refusing to write a punch item you can’t picture a stranger fixing from the description alone. If the sub reading it would need to call you to ask “which door,” the item isn’t finished, it’s just started.
Three things worth doing differently on your next walk: pin every photo to the plan set the moment you take it, never at end of day from memory. Assign a verifier who wasn’t on the crew that did the work, every time, no exceptions for small jobs. And run the internal pre-walk even when you’re confident the trades finished clean, because confidence is not the same as verification.
— Dan
How Rebuildingthetrades Helps Firms Fix Punch List Delays
If your punch lists keep dragging past two weeks on residential work or six weeks on commercial jobs, the process is probably the problem, not any single crew. Some consulting firms work directly with HVAC, plumbing, electrical, roofing, and remodeling companies to rebuild the systems around closeout: mapping the workflow from walkthrough to verified sign-off, running onsite audits to find where items stall, building KPI tracking that flags a slow-closing job before retainage gets stuck, and training service managers to run the two-step verification process.

Hiring outside help makes sense once the pattern repeats across multiple jobs, not just one bad closeout. If every project seems to hit the same wall at 80% done, that’s a systems problem worth solving once instead of relearning on every job. Start with business process mapping to see exactly where your current punch list workflow breaks down and what a fixed version looks like for your crew size and trade mix.
Sources
- Construction coverage — punch list (glossary) — ConstructionCoverage
- Construction Punch List: What to Include and How to Close Out Projects Faster 2026 – PlanUpPro
- Procore — Punch list software
- Punch List App – Simplify Your Punch Process | Fieldwire
- Punch list – Wikipedia
0 Comments